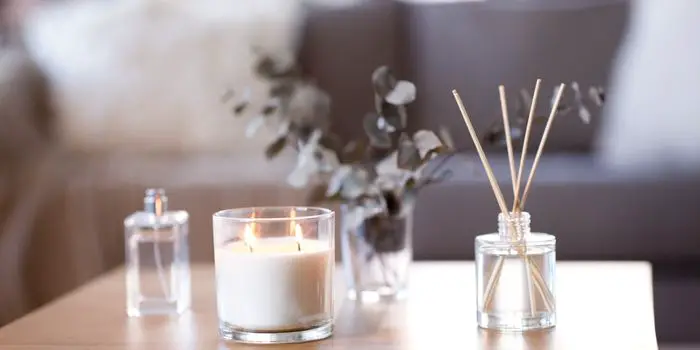
There’s something oddly luxurious about a room that smells amazing—like your space has its life together, even if you don’t.
But those little bottles of reed diffuser oil can come with not-so-little price tags.
The good news?
You don’t need to splurge to keep the good scents flowing. Making reed diffuser oil refills at home is surprisingly simple, budget-friendly, and a great way to personalize your space with scents you actually love.
Plus, it feels just a bit magical turning everyday ingredients into something that makes your whole home feel fresher.
Making Oil Refill for Reed Diffuser?
Essential oils in reed diffusers purify and make your room refreshing with the aroma and essence present in them.
However, many industrial products and essential oils are now available in the market that are not pure. Some of them contain highly toxic contents that can make the air in your room toxic.
Hence, it is better to make a homemade reed diffuser refill oil that is safe and easy to use. These liquids to use in aromatherapy reed diffusers are very cheap and easy to make using different ingredients and methods.
Ingredients Required
The basic ingredients needed to prepare essential oil for your diffuser are:
✅ Base oil:
Base oil or carrier oil is the main ingredient or backbone of making diffuser oil. This oil will help to temper the effects of the essential oil that you choose to use in our diffuser mixture.
The base oil will also carry essential oil to the top of the mixture so that it can diffuse into the surrounding air. There are a lot of options for the base oil, and some of them are:
- Almond oil
- Safflower oil
- Fractionated coconut oil
- Grapeseed oil
I prefer to use Almond oil for the carrier oil, as it’s great for the health of my family.
✅ Essential oil:
The next thing is to choose pure essential oil because that is what is going to be wafting around your house.
So it is better to pick an essential oil to our liking. Many other essential oils are also available in the market, and some of them are:
- Spearmint
- Pine
- Peppermint
- Rose
- Lavender
The best thing to start with is peppermint essential oil. And then you can try more afterward as per your need.
✅ Alcohol:
In my experience, alcohol is an optional ingredient when making reed diffuser oil. Many recipes suggest adding alcohol to thin the oils and improve how well the mixture travels up the reeds. However, I’ve achieved excellent results without using any alcohol at all.
I recommend trying your blend without alcohol first. If you find that the oil isn’t wicking properly or is moving too slowly through the reeds, you can then add a small amount of vodka to help boost the wicking process.
Steps for Preparing Homemade Reed Diffuser Oil Refill
The basic general method to make diffuser oil from an essential oil is:
- Take a half cup of base oil and mix it with 2-3 tablespoons of alcohol (rubbing alcohol or vodka).
- Add 30-50 drops of essential oil to the mixture to get the desired aroma for the oil.
- Stir the mixture well and use more drops of alcohol if the mixture is thick.

How to Make a Reed Diffuser at Home for Aromatherapy?
Rattan reed diffusers are inexpensive to build at home. And having made your DIY reed diffuser, you can place it in your desired place in your home, office, classroom, etc. With its fantastic sweet scent in the room, you can enhance your emotions and mood anytime you want.
Things you will need to make a homemade reed diffuser are:
- Water
- Essential oils
- 5-10 Rattan reeds
- A container or a bottle
Here are the exact steps that can be followed to make one.
Step 1- Find a container with a narrow neck. Your old unused bottles, such as soda bottles, are perfect to use. You can also buy a new designer-colored bottle or a mason jar if you do not want to use the old ones.
Step 2- Get some rattan reeds to add to the container. These should be 15-20 inches longer than the container. An appropriate length increases the scenting capability of the reed diffuser and may help it last longer.
Step 3- Choose your favorite scented essential oil for reed diffusers (like sweet almond oil, lavender oil, or safflower oil). These aroma oils should be of high quality and should work for a longer period.
Step 4- If you want, you can blend the oil with propylene oil, which acts as a base oil for your desired aroma oil. Mix the oils with more consistency of essential oil. Care that you do not dilute the oil with water as it does not mix well.
Step 5- Now, fill the diffuser bottle with the diffuser oil up to 75 to 80 percent. Filling the bottle above that may contaminate the reeds or can lead to overflow.
Step 6- Place reeds in the aroma oil and let them sit for an hour or two, based on the strength of the aroma oil. As the essential oil travels to these rattan reeds, it starts working, spreading the aroma all over.
Step 7- You can increase the number of reeds later as per the requirement. Try refilling, flipping, or replacing with new reeds from time to time to enjoy the best environment in your home.
Opening a Reed Diffuser Bottle Without Spilling?
Opening a store-bought reed diffuser bottle might seem simple, but it needs a careful hand. Spilled oil can damage furniture, and a splash near the eyes can cause serious irritation.
To open it safely: unscrew the cap, then gently remove the inner plastic plug using needle-nose pliers, a corkscrew, or even a butter knife. Handle with care, and you’ll avoid the mess and the risks.
How to Use a DIY Reed Diffuser Properly – How Long Does it Last?
A DIY reed diffuser is the best option to use your desired aromatic oil and enhance your living or workplace with a scented smell. However, to make it work efficiently and to get maximum benefits out of it, you need to know how to use it properly.
A few important things to care about before you use these homemade reed diffusers for diffusing essential oils are:
1- Choose the Right Reeds:
The first and most important thing to know is that reeds are not bamboo. As rattan reeds look similar to bamboo skewers, many people confuse both and end up buying bamboo sticks in place of rattan reeds.
Bamboo reeds do not contain channels to wick the oil up like rattan reeds. Therefore these do not work at all if you choose them for making your reed diffuser.
If you are concerned about where to buy reed diffuser sticks best, we recommend searching for them online at stores such as Amazon.
Here you can find the best natural Rattan reeds at the most affordable price for making your reed diffuser.
2- Choose The Right Number of Reeds:
Deciding how many reeds you should use in your diffuser is a matter of personal preference. We recommend placing anything between 5-10 reeds as per your requirement.
As more reeds mean more scent, try using a fewer number of reeds initially. If you feel the aroma is too light or too strong, you can prefer adding or removing the reeds respectively.
3- Turn, Flip, and Change Your Reeds with Time:
Turn over the reeds daily (or at least every 2-3 days) to saturate both ends well in the reed diffuser oil refill. This technique helps to speed up the process of soaking them from the bottom and diffusing the entire wood reed.
When the reeds start to lose their fragrance, recognize the need to change the reeds before the oil is drained.
The best is to keep on changing the reeds every week. As these reeds get completely saturated over time OR clogged with dust and other impurities present in the air, they should be replaced every week or every fortnight.
This is important so that you continue to have a pleasant and sweet home environment with your family weekly.
4- Do Not Re-Use The Reeds:
Care that you do not try using the same reeds again, especially when you want to get a more pungent smell.
The reeds you have used for a particular scent before should not be used again for another scent or aroma oil. If you use them, they may end up providing an undesirable scent due to the combination of two or more oils.
Using new rattan reeds is hence recommended at a time when you feel that the reeds have become fully saturated OR in case you want to use a different fragrance.
5- Do Not Light The Reeds:
Few people think that lightning the reeds may prove better for getting the aroma in the room.
But be alarmed. As diffuser essential oils are flammable, you need to keep your reeds away from open flame.
6- Place The Diffuser Safely:
Make sure to keep it away from electronic appliances, small children, and pets. If there are kids or pets at home, you should try placing them at a higher level so that it becomes out of reach for them.
Also, care that you do not place your reed diffuser jar/bottle on the wooden surfaces as it can leave marks of essential oils. Children at home can also make it spill over the wooden surfaces, leaving your wood tables and furniture damaged.
The best is to place your reed diffuser on a glass table or glass surface. Place it in such a way that it is near a source of airflow (like a window or vent). This will help fragrance your room fast without any risk. Having placed it in a safe place, you can feel a slight smell which goes on increasing within 24 hours.
How Long Do Reed Diffusers Last?
The average time the aroma oil can last in your reed diffuser may depend on various factors.
These factors may include:
- Dehumidifier in your room
- The room ventilation (open or closed doors)
- Air conditioner or heater operating in your room
After using about 20 reed diffusers simultaneously at different locations, we have found that a bottle of 100ml of essential oil can last for up to 3-4 months on average.
However, as mentioned above, this will depend on your room’s temperature and humidity.
The Conclusion
Refilling your reed diffuser at home isn’t just easy—it’s smart, budget-friendly, and lets you customize scents to match your mood or the season.
With a few basic ingredients and a little creativity, you can keep your space smelling amazing without breaking the bank.
So go ahead, mix up your signature scent and let those reeds work their magic—your home (and your wallet) will thank you.
Meen Smith is a nurse by profession who loves writing online, spending time with her family and caring for the elderly. She has already worked as an associate editor on various moms, babies, home appliances, kitchen, and healthy living blogs. In her spare time, she also enjoys drawing, reading/writing kindle eBooks and improving her skills a bit.