Despite knowing all the benefits of healthy air, we are all forcing our bodies to breathe in stale air, which can lead to various health issues.
We think that air pollution is present only outdoors (smoke, haze hanging in the air, ozone, etc.). However, the truth is our inside offices, homes, and time spent indoors could be more polluted than the air outside.
The healthy indoor air (which we usually think) is often more polluted as it carries lots of dirt/dust particles, fire retardants, volatile chemicals, radon, and fragrances used in cleaners. Some of these pollutants are tracked in the home itself, whereas some arrive through furniture, new mattresses, wall paints, carpet cleaners, etc.
Knowing about its possible causes can help us make improvements at home. So, here are the most effective tests you can make to start improving the quality.
5 Effective Indoor Air Quality Tests
Your home’s air quality can seriously affect you and your loved ones. For this reason, it’s important to monitor the air quality of your home regularly. By optimizing the quality of the air you breathe indoors, you can enhance your overall well-being and enjoy better health outcomes.
Additionally, understanding the current state of your indoor air allows you to take informed steps to improve it—whether by increasing ventilation, reducing pollutants, or using air purifiers.
With this in mind, let’s explore five effective methods to test indoor air quality in your home.
1- CO₂ & Humidity Monitors (Basic DIY):
Small, affordable meters measure carbon dioxide (via NDIR sensors) and relative humidity/temperature. These indicate ventilation quality and moisture risk.
For example, many under-$100 CO₂ monitors (often with built-in hygrometers) continuously sample the air for CO₂ (ppm) and humidity epa.gov. High CO₂ or high humidity readings point to stale, poorly ventilated air and mold risk.
Such devices cost on the order of $50–$150. They’re ideal for homeowners or renters checking room ventilation (e.g., classrooms, offices) and for anyone wanting simple alerts (green/yellow/red) of rising CO₂ or damp air. Low cost makes them accessible for general use and for families or landlords with limited budget.
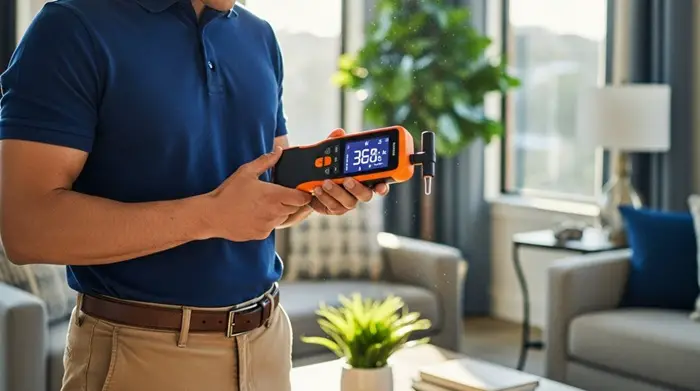
2- Multi-Parameter Smart Monitors:
Consumer “smart” monitors detect multiple pollutants at once. For example, the Airthings View Plus continuously measures particulate matter (PM2.5, often PM10 as well), total volatile organic compounds (VOCs), CO₂, radon, humidity, and temperature, with data sent to a phone app.
Other brands (Awair, Foobot, Temtop, etc.) similarly combine NDIR CO₂ sensors, PM laser counters, VOC sensors, and humidity/temperature probes. These give real-time readings and long-term trends. Such devices cost a few hundred dollars (e.g. View Plus is ~$300).
They suit tech-savvy homeowners or families (especially those with allergies/asthma) who want continuous monitoring of a broad range of pollutants.
For example, tracking PM2.5/PM10 can alert wildfire smoke or dust, VOC readings warn of off-gassing, and CO₂ tells you when to improve ventilation. (Tip: many models also provide an air-quality index or color-coded display for ease of use.)
3- DIY/Open-Source Sensor Kits:
Hobbyists can assemble custom monitors using sensor modules. For instance, the open-source AirGradient ONE kit ($140) includes commercial sensors for CO₂ (NDIR), PM2.5 (laser-scattering), total VOC, NOₓ, and temperature/humidity.
Users solder or plug the components onto a board and power it via USB. These DIY kits require some assembly and calibration, but allow flexible data logging or integration with smart-home systems.
They are relatively low-cost ($100–$200 vs. ~$300 for pre-built units) and are ideal for tinkerers or schools and community groups (with some technical skill).
The result is a “build-your-own” monitor that reports the same pollutants as professional units (PM2.5/PM10, VOCs, CO₂, humidity/temperature). (Such kits often support Wi-Fi or Bluetooth and can feed data into open dashboards, giving full control to the user.)
4- At-Home Test Kits (Mold/VOCs):
For targeted testing, DIY kit kits let you sample air or surfaces and mail in for lab analysis.
Mold tests: Petri-dish-based kits (e.g., Mold Armor) capture mold spores from a room or HVAC; you leave a prepared dish open for 1 hour and incubate it.
Visible mold colonies appear on the dish within 48–96 hours if spores are present. These kits ($20–$30 each) provide a quick indication of mold in the air or on a surface. (Optional lab analysis can identify the mold species.)
VOC tests: Rental kits like Home Air Check’s VOC+Mold test (~$240) draw indoor air through sorbent tubes; the lab then analyzes hundreds of VOCs and mold growth. Results arrive by email in ~5 days.
Similarly, you can buy formaldehyde test strips or badges for specific chemicals. These kits are suited for concerned homeowners or renters, especially after renovations or if occupants smell chemicals, who want concrete, lab-verified results. For example, the Home Air Check VOC/Mold kit reports levels of 500+ chemicals plus mold.
Note: At-home kits give a snapshot of current conditions; follow instructions carefully.
5- Professional IAQ Assessment (Advanced):
Hiring a certified indoor-air specialist provides the most comprehensive evaluation. Professionals use calibrated instruments (e.g., high-end particle counters, PID/VOC meters, gas analyzers, moisture meters) and may collect air or dust samples for laboratory analysis.
They can test for mold (air spore traps or surface swabs), specific VOCs (GC/MS analysis), CO₂, formaldehyde, allergens, etc. According to industry surveys, a basic professional IAQ inspection runs on average $300–$700 for a whole-house check, though complex jobs (large homes, many samples) can approach $1,000.
For example, Angi.com reports mold-specific air tests at ~$300–$1,000 and single VOC sample analyses at ~$200–$300. This method is best for buyers/sellers or health-compromised families needing authoritative results.
A pro report may include not just levels but recommendations (e.g., ventilation fixes, mold remediation). Keep in mind: pro testing is expensive, but it can diagnose hard-to-find issues that DIY tools might miss.

What Causes Poor Air Quality in a Home?
Just because you are staying indoors, you should not think that you are safe from all the polluted air and airborne particles found outside your home.
If you’ve found the air quality in your home to be poor, it could result from many different scenarios.
The most common of these problems include:
Mold: Mold is one of the most common problems affecting your home’s indoor air quality.
Mold can result from a variety of factors but usually presents itself with water leaks. Treat mold quickly, as it can be a serious health risk. Care that you contact an expert to do so, as improper treatment can cause mold to spread further.
Smoke: Those who smoke indoors have terrible home air quality. Even if you smoke with the windows open and the air on, this smoke can creep into fabrics and other parts of your house.
Poor Ventilation: Without proper ventilation, the air quality of your home will suffer. Since bad air remains trapped in your home, it can’t be appropriately cycled and filtered. Over time, it will get continually worse.
How Can You Improve Air Quality in Your Home?
Now that you know about the various causes of poor air quality in your home, if you’re now looking to better the air quality of your indoors, you need to consider the following important tips:
1- Clean Your House
This one may come as a no-brainer. If you’ve got anything dirty lying around, your home’s air quality will suffer.
Unfortunately, it’s not always this straightforward. Certain smells and odors may be lingering in fabrics and furniture. This means that you’re going to have to do a large-scale cleanup to get your house in order.
2- Control the Humidity
Make sure that you have appropriate levels of humidity in your home. Having too much or too little can negatively affect air quality. It may even make it harder to breathe. This can be done in a variety of ways. First, make sure that you’re controlling the moisture in your home.
The best way to control your home’s humidity in dry areas is to invest in an air humidifier. These can be portable and plugged into specific rooms, or they may be whole-house humidifiers.
If your humidity level has seen a dramatic spike (like in the basement), consider the possibility that your home may be experiencing a water leak. In such cases, if you’re looking to decrease the overall humidity of your home, consider investing in a dehumidifier.
3- Don’t Allow Smoking Indoors
Smoking is injurious to health. There is no safe level of secondhand smoke. Even when it’s cold outside, you should avoid smoking and visitors who love to smoke.
Even a one-time smoke of the visitors visiting your home can contaminate your house with allergens that are hard to remove. You can, therefore, ask smokers to visit your home to smoke outside (keeping your doors closed) for the sake of the health of your family and yourself.
4- Keep an Eye on Chemical Fumes
A common cause of bad air quality in places like the basement in your home is the item you store there.
Storing chemicals such as paints, paint thinner, solvents, gasoline, liquors, and gas-powered equipment is common practice for most homeowners.
However, we forget that the fumes from these types of harsh chemicals can easily pollute and worsen the air quality in the basement. To avoid these chemical fumes, you can either altogether avoid storing them or get them sealed correctly in a container before keeping them in a basement storage room.
5- Test for Radon in Your Basement
There may be many causes of radon in your basement. And testing for this serious air-quality hazard is most important when it comes to improving the air quality in your basement.
In general, old homes with basements can have major radon problems. And testing for it at regular intervals is the only way to know the quantity and how you can get rid of it.
If radon is found at dangerously high levels, you should get the help of a professional tester and a qualified contractor to get your family protected.
6- Say No To Toxic Household Products
Art and hobby supplies, cleaning agents, and nail and hair products carry an increased level of VOC at home. These elements are harmful to health and can cause eye or skin irritation.
Try not to encourage these kinds of purchases, especially if you have kids or an allergic person at home. If required, make sure you buy them in minimal quantities and store them properly in a storage box to avoid dangers.
7- Do Not Let The Ideal Car Sit In The Garage
Your car in a garage carries a certain level of carbon monoxide, which leads to various problems like nausea, weakness, and unconsciousness.
Even if the car is sitting ideally in your attached garage, it releases various chemical fumes, which are again bad for your indoors and overall health. As it pollutes the indoor air too, it can easily make you and your family members sick.
As a remedy, you can use the tools like an exhaust fan for a garage that can help you to improve the overall garage air circulation. These are important for efficient garage ventilation and improving air quality there.
The conclusion
DIY indoor air quality testing kits are a cost-effective means in comparison to hiring a professional, as it may get costly to do all the testing. You just have to follow your instincts, check out the symptoms, and try to narrow down the possibilities.
The benefits of using a kit to monitor indoor air quality are many, but most importantly, it helps you find out what is causing potential health issues and what steps should be taken to ensure that the air in your house is pure and clean.
It is recommended to get a suitable air monitoring device and check the air quality in your home every 3-6 months.
Once a year, you can get the air quality in your home monitored by seeking a professional checkup. However, if you live in an area where the air quality is disastrous, it’s important to get it checked sooner for the welfare of your family.
Meen Smith is a nurse by profession who loves writing online, spending time with her family and caring for the elderly. She has already worked as an associate editor on various moms, babies, home appliances, kitchen, and healthy living blogs. In her spare time, she also enjoys drawing, reading/writing kindle eBooks and improving her skills a bit.