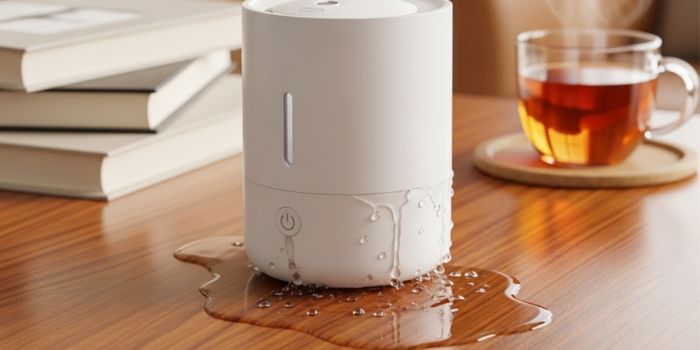
One of the most common problems people face with humidifiers is leakage. Over time, if a humidifier isn’t properly maintained, small issues can build up and eventually cause water to leak.
If you’ve noticed water dripping from the humidifier in your HVAC unit, don’t worry—it’s a fixable problem.
In this article, I will walk you through the typical reasons behind humidifier leaks and share practical, easy-to-follow solutions.
Hopefully, with the right care, you can get your device back to working efficiently and keep enjoying the benefits of balanced humidity at home.
Reasons for a Leaking Humidifier and Easy Fixes
A humidifier plays an important role in keeping your indoor air comfortable and healthy, so it’s worth taking a little time to troubleshoot when something goes wrong.
Here are the most common reasons why your unit might show the signs of leakage and how to fix your humidifier if it leaks from the bottom…
1- Clogged Filters
One of the most common reasons portable room humidifiers start leaking is a dirty or clogged filter or an evaporator pad (also known as a water panel or wick).
The filter’s job is to trap impurities and minerals before the water enters the humidifier.
But when the filter isn’t cleaned regularly—or if the water supply is particularly dirty—it can get clogged up. Once that happens, water can’t flow through properly, and leaks are often the result.
The Fix:
Make it a habit to check your water filter regularly and replace it according to the manufacturer’s guidelines. The frequency may vary depending on your humidifier model and the quality of water you use.
As a rule of thumb, give the filter a good cleaning at least once a month to keep things running smoothly. And if the filter looks damaged or is too clogged to clean, don’t hesitate to swap it out for a new one—your humidifier (and your comfort) will thank you.
2- Drain Line
The drain pipe is responsible for carrying excess water away from your humidifier. But over time, dust, mineral deposits, mold, or even algae can build up inside the pipe, creating blockages.
When water can’t drain properly, it backs up into the machine, leading to leaks, mold growth, and potential damage to both the humidifier and anything nearby—like flooring or furniture.
The Fix:
- Turn off the power and unplug the humidifier for safety.
- Remove the drain pipe and inspect it for clogs or buildup.
- Clean the pipe by flushing it with warm water mixed with white vinegar (or a mild cleaning solution).
- Replace if necessary – If the pipe is badly clogged or damaged, install a new compatible one.
- Reassemble and test – Reattach the pipe and make sure water flows smoothly out of the unit.
For whole-house humidifiers like Honeywell or Aprilaire, make sure the drain line is sloped downward and away from the unit.
Even small dips can trap air bubbles, causing water to back up. To prevent issues, inspect the line regularly and adjust if needed—or simply replace it once a year for peace of mind.
Extra Tip: If you notice heavy mineral buildup around the drainage hole, gently clear it using a needle, toothpick, or a soft brush. This helps remove debris without damaging the unit and restores proper water flow.
3- Solenoid Valve
In many whole-house or furnace humidifiers, water flow is controlled by a solenoid valve. This valve works with the humidistat, opening or closing automatically to let water in as needed.
Over time, however, mineral deposits, dust, or simple wear and tear can cause problems.
When the valve gets clogged or damaged, water may not flow correctly—or worse, it may leak. This not only reduces your humidifier’s efficiency but can also lead to water damage around the unit.
The Fix:
If you notice leaks or an inconsistent water supply, start by disconnecting the power and shutting off the water using the saddle valve. Then:
- Inspect the valve – Look for dirt, debris, or mineral buildup.
- Flush and clean – Remove the valve gently and rinse it with water. For stubborn deposits, use a diluted vinegar solution or a specialized cleaner.
- Check water flow direction – Make sure the valve is installed so water flows the right way.
- Reassemble and test – Reconnect the valve, restore power and water, and confirm the leak is gone.
If the valve is too worn or won’t close properly, replacement is the best option. When installing a new solenoid valve, double-check all connections to ensure a watertight seal and long-term reliability.
4- Faulty Water Line
Another common cause of leaks is worn or faulty water line connections. Over time, valves and connectors can loosen, crack, or corrode from regular use or age.
When that happens, water may escape from the supply line instead of entering the humidifier, potentially damaging nearby components, furniture, or flooring.
The Fix:
- Inspect all water line connections and valves for signs of wear—such as cracks, rust, or looseness.
- Tighten any loose fittings using the right tools.
- If you find a damaged part, replace it with a compatible connector or valve.
- Once repaired, run the humidifier and carefully check for any lingering leaks.
5- Higher Water Pressure
Wrong water pressure in your line is again one of the significant causes of leakage in your humidifier attached to the furnace.
In most cases, when it is higher, that may be causing the humidifier to leak.
It is, therefore, reasonable to check the water pressure in your house regularly (3-4 times a year). This should be an essential part of your plumbing maintenance checklist.
For checking the water pressure quickly at home, you can use a pressure gauge (readily available at Amazon) that measures in psi (pounds per square inch).
Make sure it is not higher than 125 psi. If found high, you can either turn down the saddle valve to get it reduced or take the help of a plumber to lower the amount of water that is going to the furnace, HVAC, and humidifier.

How Cracked Tanks and Trays Cause Humidifier Leaks?
Two of the most overlooked yet common causes of humidifier leaks are a cracked water tank or a damaged water distribution tray.
Both components play a crucial role in the smooth functioning of your humidifier, and when they fail, leaks are almost inevitable.
Cracked Water Tank
The water tank holds the main supply, and over time, it can develop cracks from regular wear, accidental bumps, or environmental stress.
A cracked tank not only causes messy leaks but can also expose internal components to water damage.
- Temporary fix: Small cracks can sometimes be sealed with a waterproof silicone adhesive, but this should only be viewed as a short-term solution.
- Long-term fix: Replace the tank entirely if the crack is large, deep, or keeps worsening. For prevention, clean the tank regularly and avoid placing heavy objects on top of it.
Damaged Water Distribution Tray
The distribution tray is responsible for spreading water evenly throughout the humidifier. If it cracks, warps, or breaks, water will overflow or pool unevenly, leading to leaks and reduced performance.
The best solution to fix leaks due to a damaged water distribution tray is to replace the tray immediately. Also, ensure it is properly seated and free of obstructions so water can flow evenly.
Should You Use A Drip Pan Under a Humidifier to Fix the Leaking Mess?
Humidifiers, whether portable or whole-house, are designed so that condensation doesn’t form on the outside of the unit.
Under normal working conditions, you shouldn’t see any dripping at all.
However, if you do find water pooling underneath, that’s not “normal sweat”—it’s a red flag. Issues like a clogged filter, blocked drain line, or leaky valve are often the real culprits.
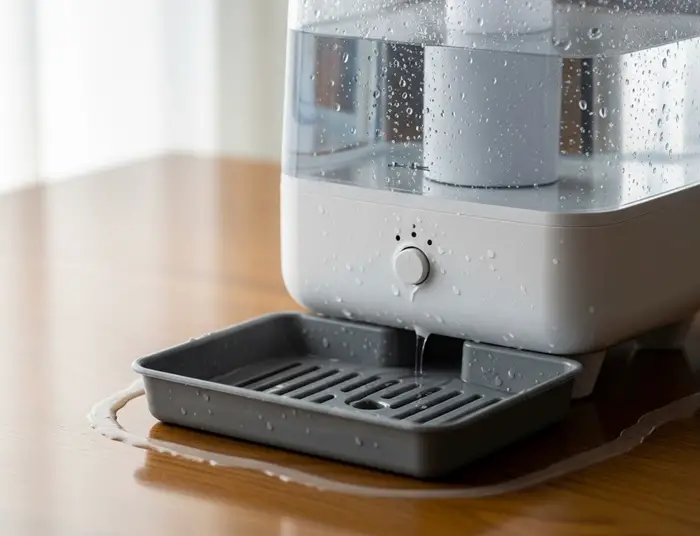
In these cases, putting a drip pan under your unit is like putting a bucket under a leaky roof—it might protect your floor for now, but it won’t solve the actual problem.
The smarter (and safer) move is to identify and fix the root cause.
That said, if you need a quick temporary fix, you can slide a small towel, a waterproof mat, or a shallow tray under the humidifier. This will safeguard your floors or furniture from minor drips until you can repair the unit.
Pro Tip: If your humidifier sits on hardwood, laminate, or carpet, consider placing it on a waterproof mat year-round—not because it should leak, but as an added layer of protection against the unexpected.
The Conclusion
Whether it’s checking for cracks, cleaning out mineral buildup, or making sure the drain line is angled correctly, small inspections go a long way in keeping your humidifier running smoothly without any leaks.
Remember, most humidifier leaks start from minor issues—clogged filters, cracked tanks, or loose connections. Addressing them early not only extends your humidifier’s lifespan but also protects your home from unwanted water damage.
You can certainly handle many of these checks yourself, but scheduling an annual visit from a trusted HVAC technician is a smart investment. They’ll spot issues you might miss, clear out hidden debris, and replace worn components like the solenoid valve before they cause bigger problems.
Meen Smith is a nurse by profession who loves writing online, spending time with her family and caring for the elderly. She has already worked as an associate editor on various moms, babies, home appliances, kitchen, and healthy living blogs. In her spare time, she also enjoys drawing, reading/writing kindle eBooks and improving her skills a bit.